

If you’ve got the tools, time and the patience you’re perfectly capable of cleaning your own windows, and I’ll tell you how.
Let us start with the equipment; firstly you’ll need a large enough bucket to fit a washer inside, you can pick these up from any hardware/warehouse store for under $20.
Next is your squeegee, this is a window cleaner’s best friend, this is one of the only pieces of equipment I would recommend spending a little more money on as the results speak for themselves and make the job a lot easier.
Finally some good glass polishing cloths, these are ultra-absorbent and don’t leave behind any streaks or micro-fibre, and a glass-safe scrubber these are gentle enough that they won’t scratch your windows but scrub away any problematic stains.
There’s nothing to the cleaning product you use; typically any dishwashing liquid is perfectly suitable as they aid in the breakdown of natural oils and usually don’t leave many watermarks after drying.
Once you have all your tools, you’re ready to go, start by adding a touch of your chosen cleaning product to your bucket, a little goes a long way, so there’s no need to go crazy, this won’t improve your results that dramatically. Half fill your bucket with water, and you’re all set.
Begin by removing your flyscreens where possible; you can either stack them all together and simply hose any dust off of them or, use a brush to dust off the debris individually which doesn’t require any drying time.
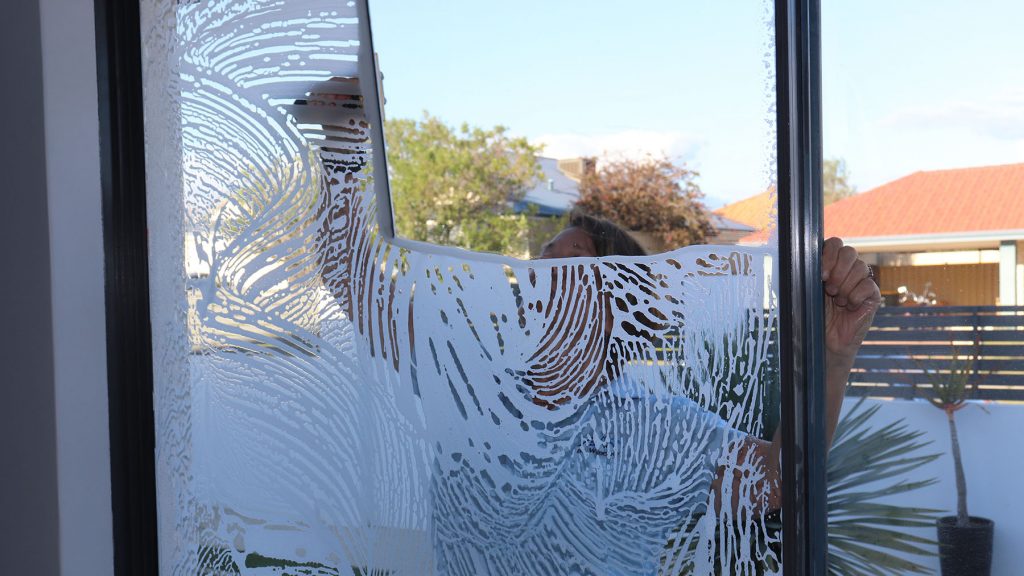
Next foam up your glasswasher you want a nice lather on your window as the cleaning product can help remove any potential calcium buildup.
(A handy tip for any nasty calcium stain, apply some CLR after the first wash and use your glass scrubber to scrub at the stains gently, leave for 5-10 minutes then rewash the window.)
Next, patiently squeegee your window top to bottom, then use your glass polishing cloths to dry up any streaks from the edges or stubborn stains.
Soon enough, you’ll be in a good rhythm, typically a standard 4/2 inside and out will take a professional window cleaner around 4 hours.
For someone that is giving window cleaning a go for the first time, it could be up to 6 hours if like the professionals you’re cleaning window frames, flyscreens and sliding door tracks.
It’s also important to monitor your water quality, as a rule of thumb change your water after every ‘side’ or ‘face’ of your house. This ensures you aren’t making the job more challenging and furthers my previous point ‘use your cleaning product sparingly.’
It’s essential to consider the time taken when starting your window cleaning project, once you’ve begun it’s obvious which windows have been cleaned and which haven’t. So you’re in it from start to finish; make sure you have the time on the given day.
To ensure your windows stay in tip-top condition for longer, cleaning your windows is recommended every 3-4 months. The buildup of dust and other debris such as calcium can permanently stain or corrode your windows and the frames; this could mean rusty frames which inevitably will cost you money to replace.
If you don’t have the time every couple of months, I would recommend getting your windows cleaned professionally to maintain not only the aesthetic of your home but the longevity of your windows.